|
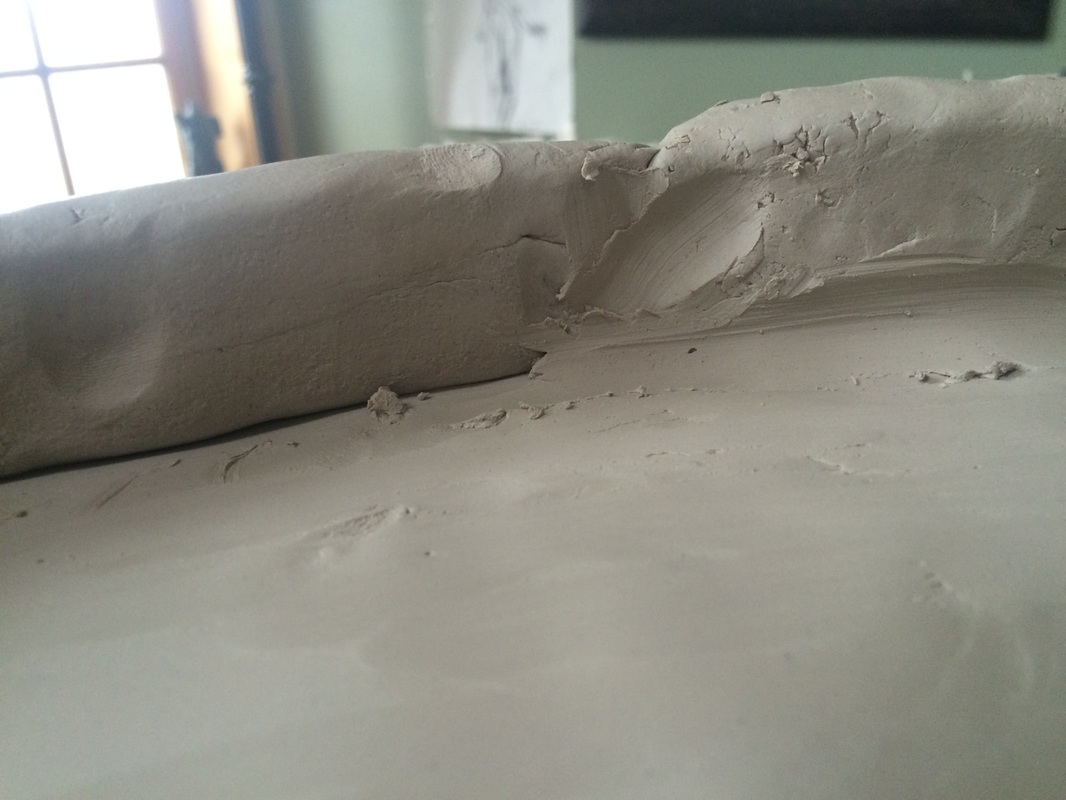
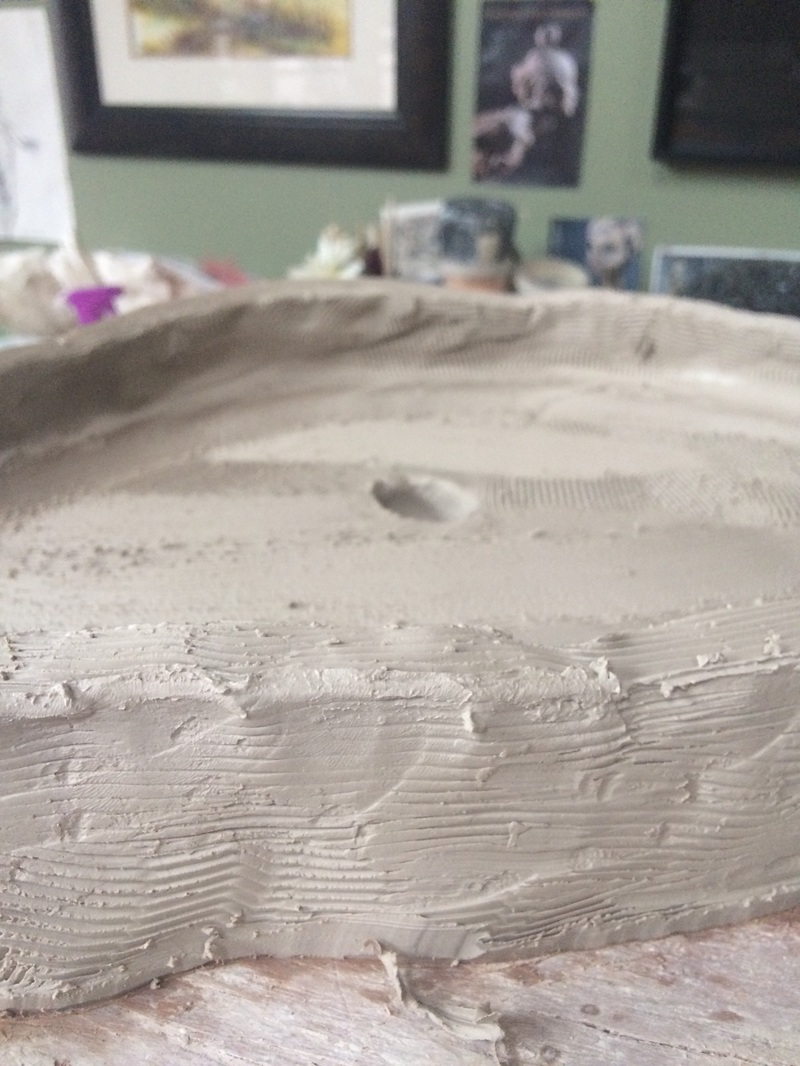
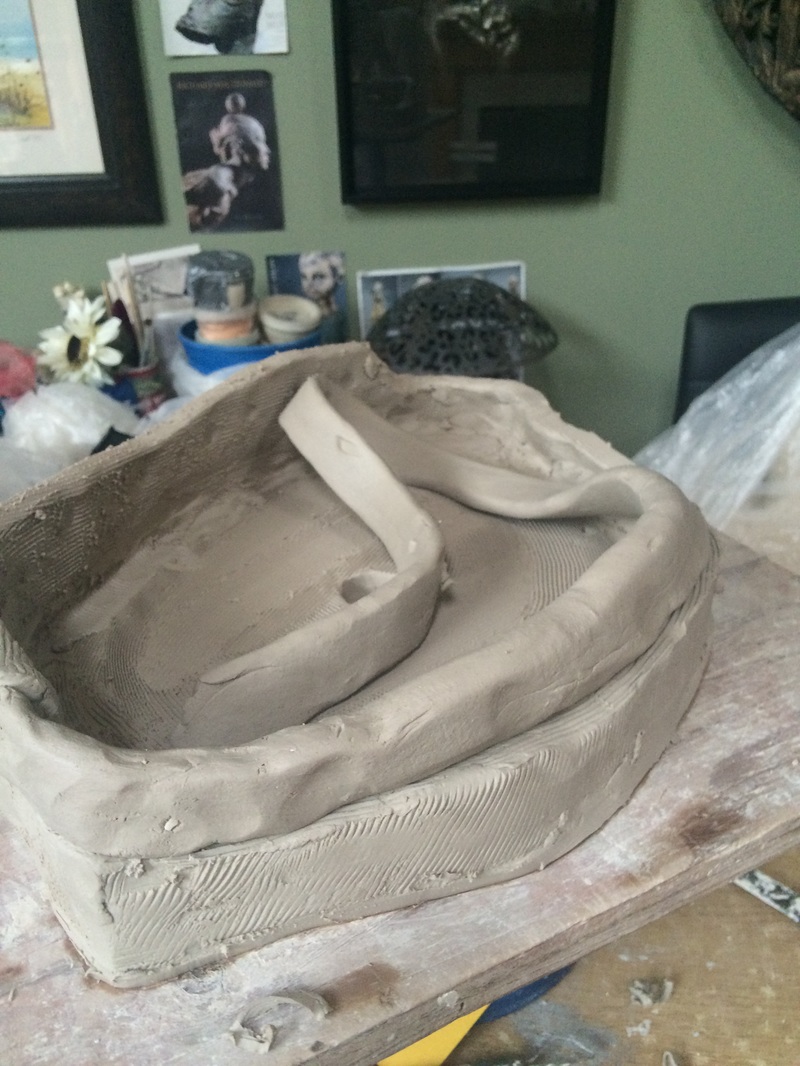
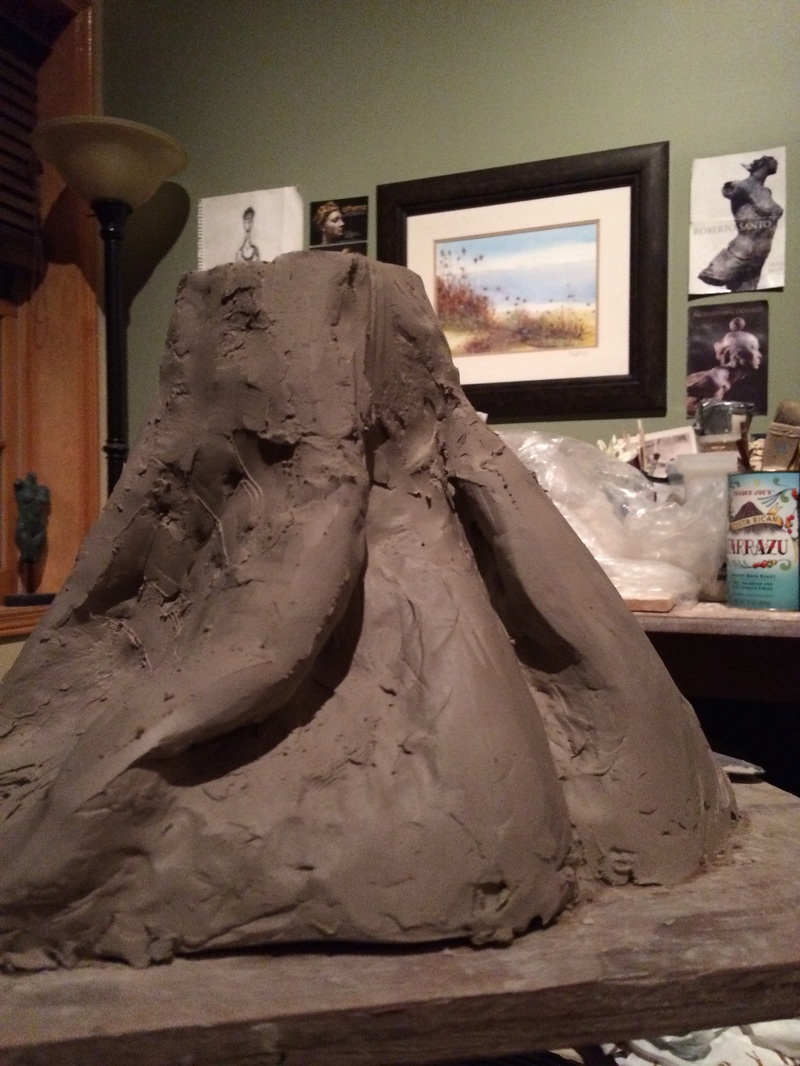
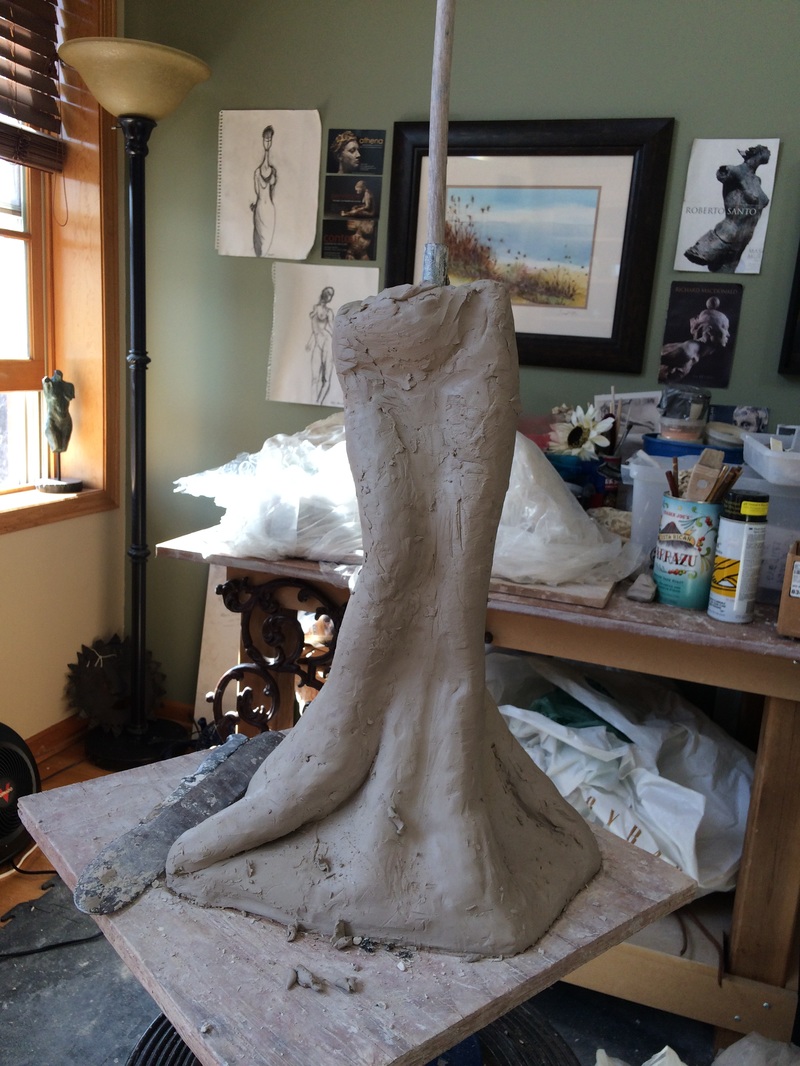
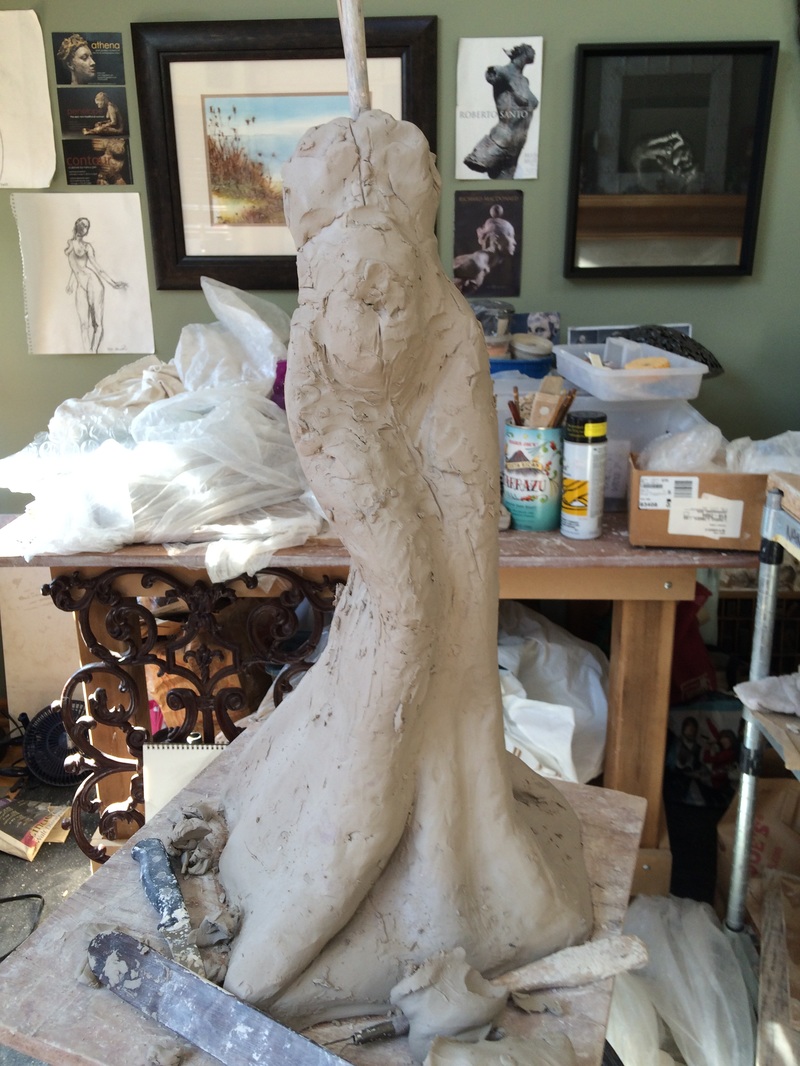
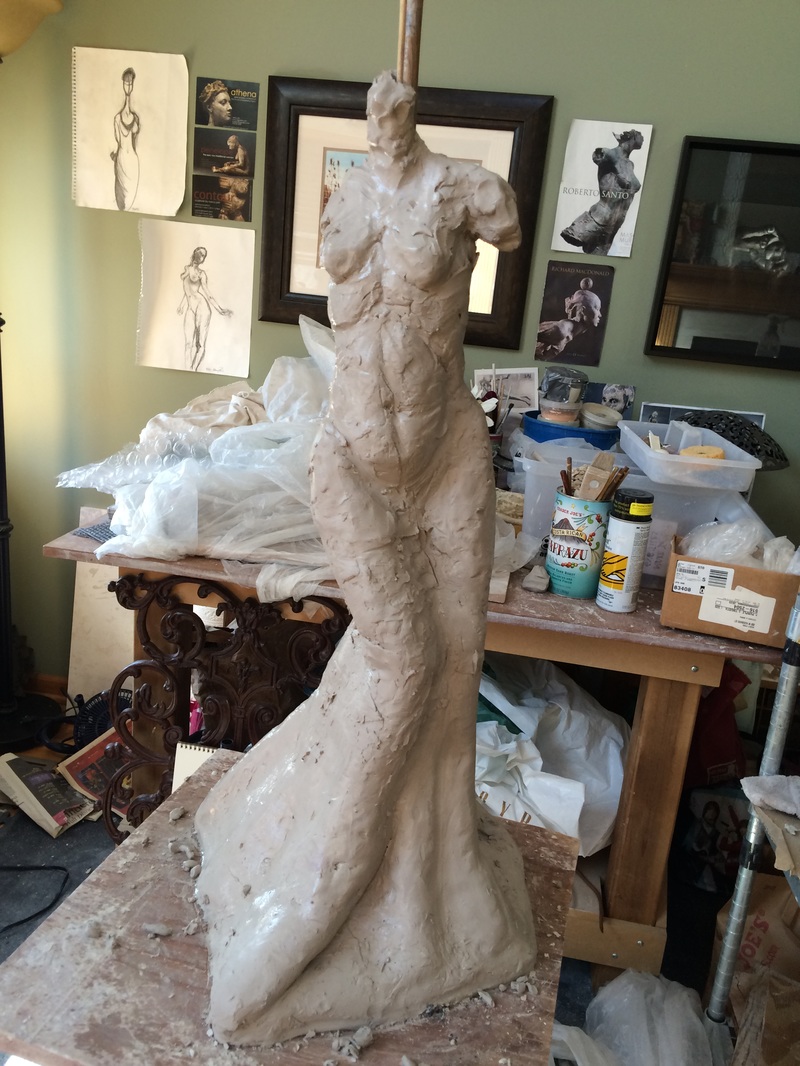
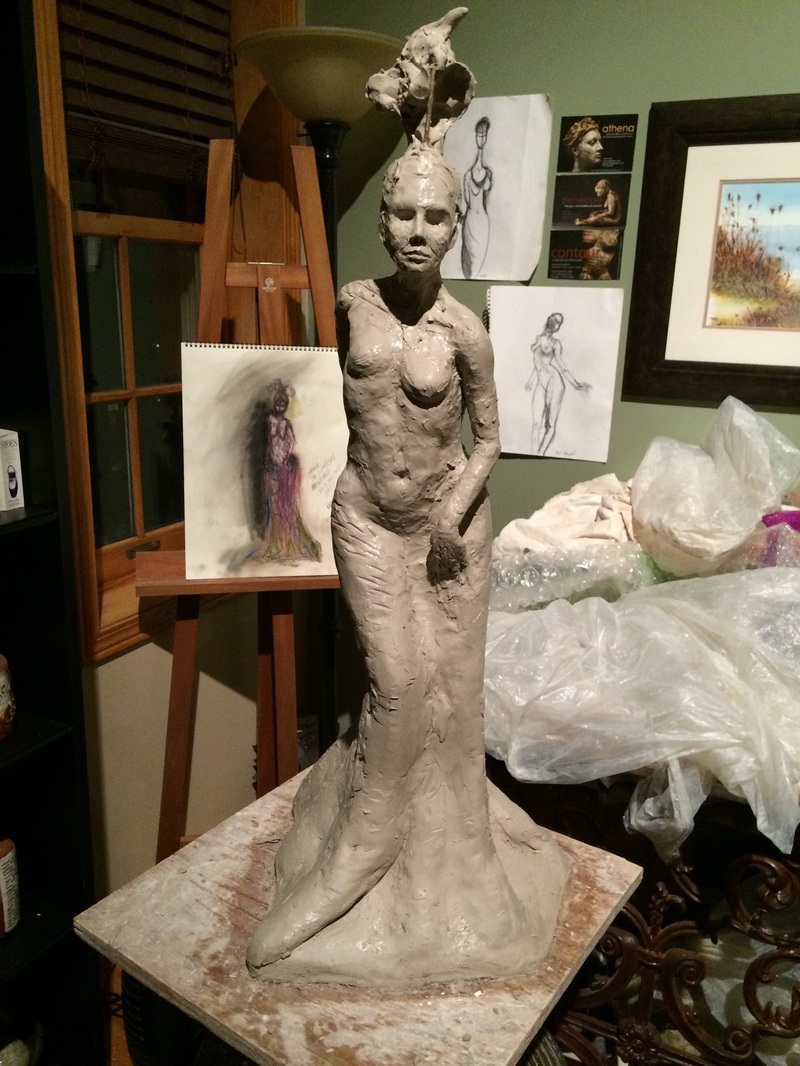
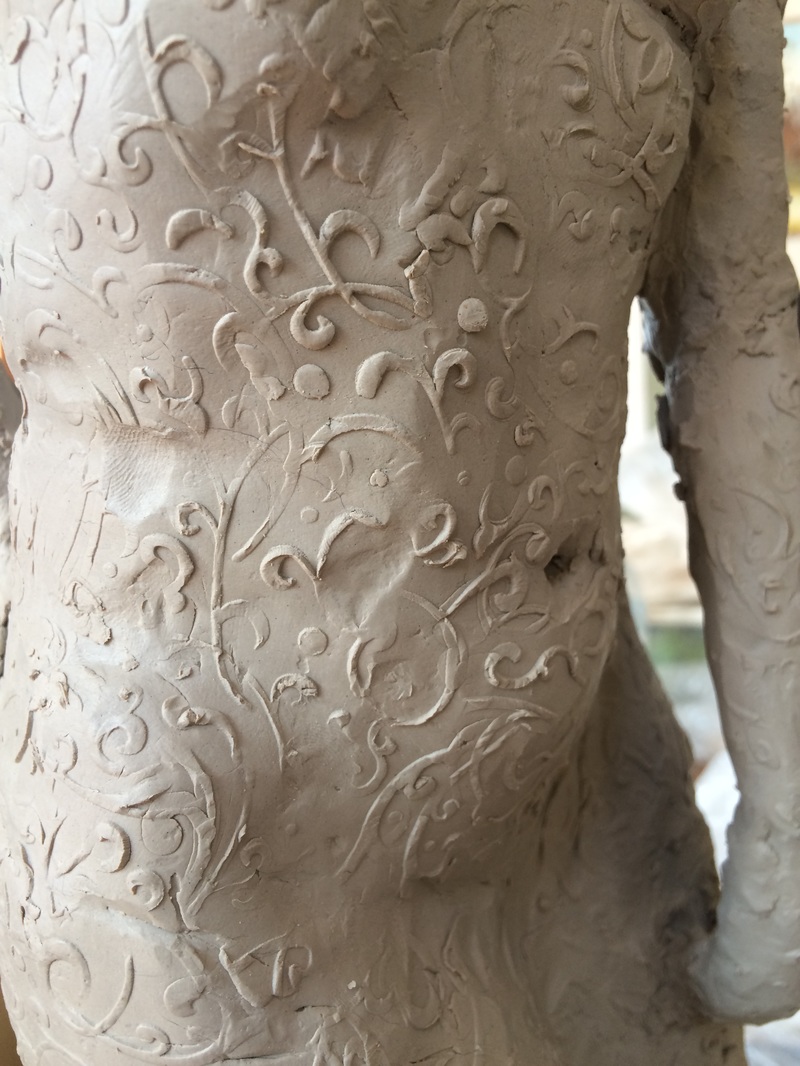
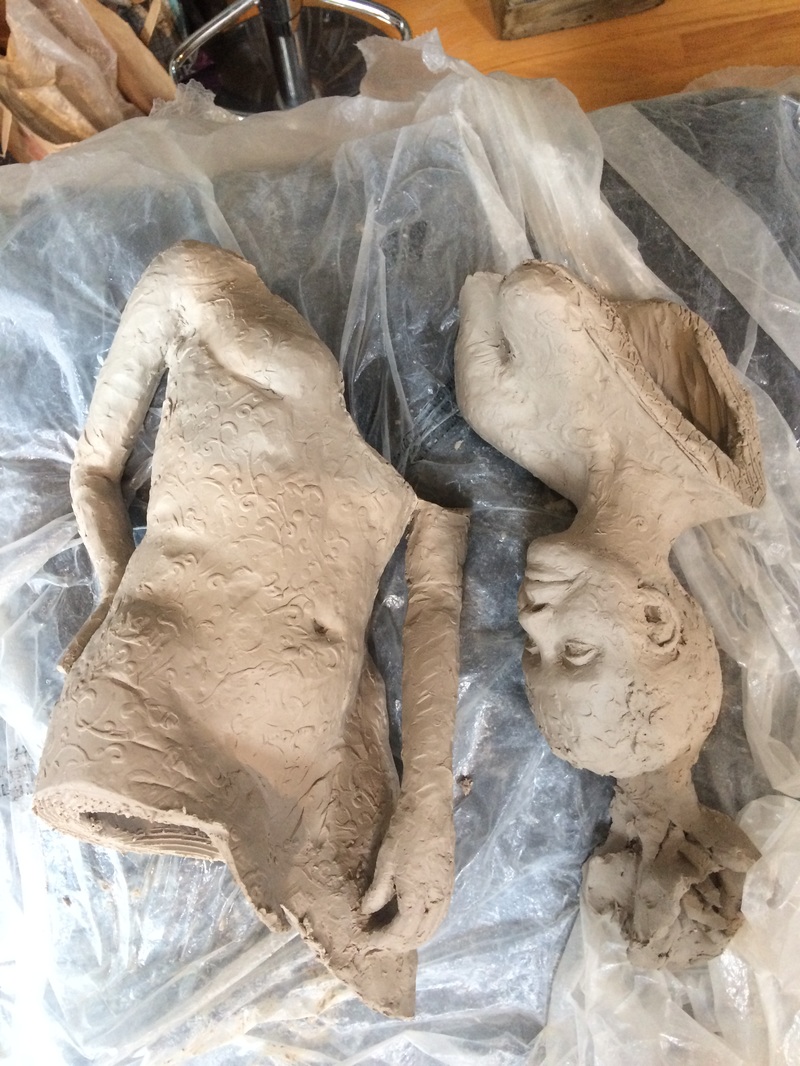
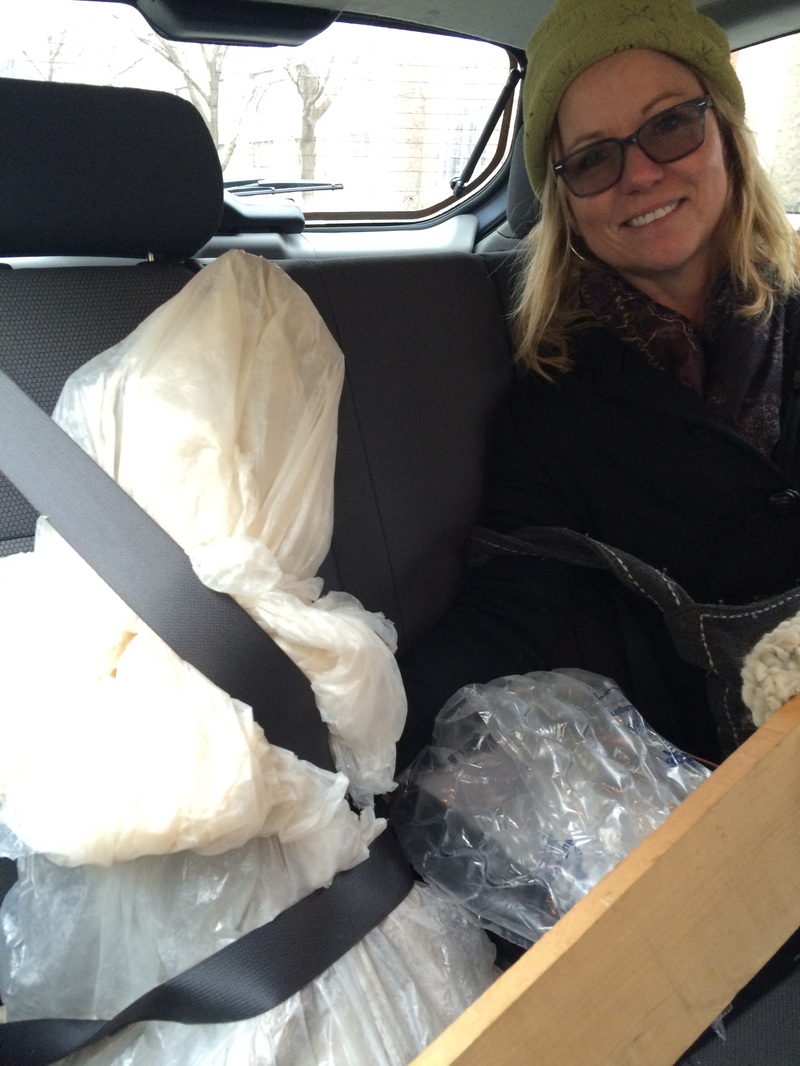
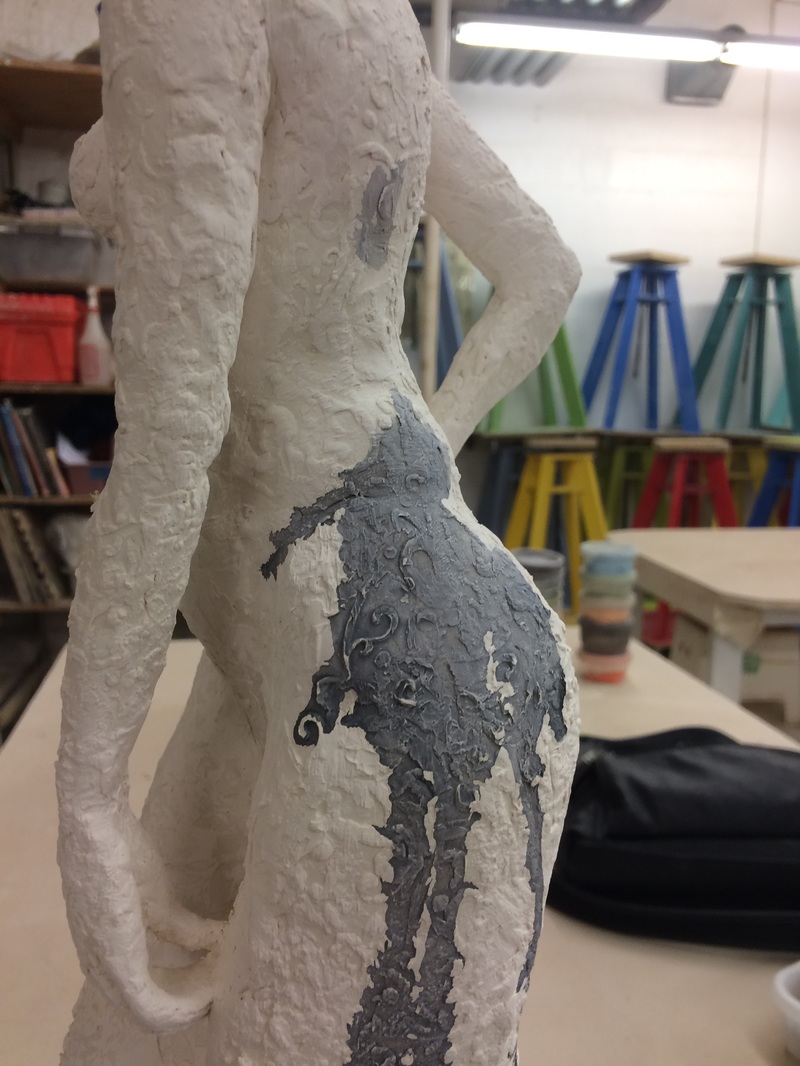
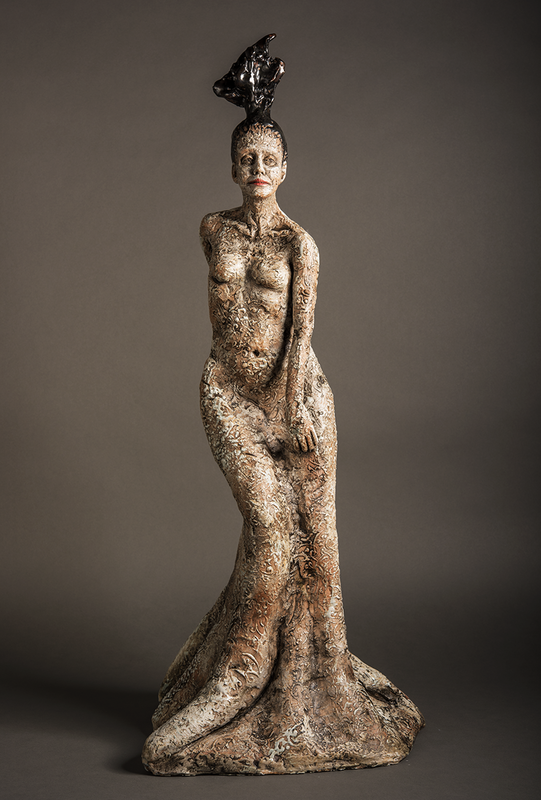
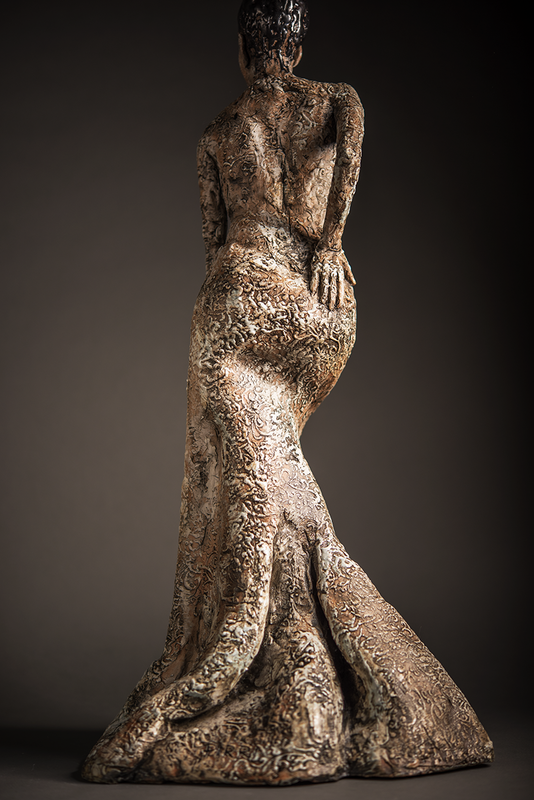
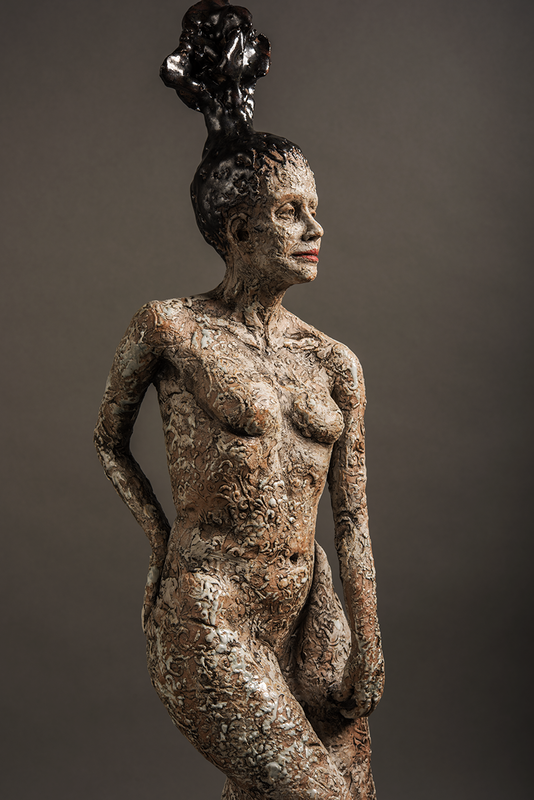
Here are the steps I took to make Ophelia: 1) Make a slab - at least 1" thick for the base - This will be her 'footprint' 2) Roll large coils and start building the 'outside' wall - This will be her Dress 3) Attach your coils very well... using your fingers or tools; RULE IS: ALWAYS SLIP and SCORE (wet clay mixed with water - use like glue), but, if the clay is wet enough you do not have to slip and score. As you can see here. Just remember TIGHT 'CONNECTED' COILS MATTER! Timing is everything with clay. I wait a couple of days for the clay (bottom of the dress) to get a bit harder and paddle it so the clay 'folds' like fabric. I continue to coil build 'UP' imagining a figure underneath and shaping the 'outside' of the piece. This is quite difficult but worth it as you do not have to hollow out and the piece is lighter. Upper half of her body is done SOLID. After she is done (with head/arms) I added texture from a laser cut rolling pin. The wetness of the clay is very important - not too wet, not too dry so you are able to press the rolling pin into the clay to achieve this texture. She needs to be hollowed out so I cut her in 3 places... Head is last (and only cut the 'crown of the head). Make deep cuts after you put pieces back together and press wet clay into the 'channel' you have made. I kept her in HALF for the ride over with my good friend Gail to help me. Once she is safe and sound at Lillstreet Art Center, I put her back together using the method above. I add white porcelain slip over the enter piece using a dry brush (sorry no pic). Off to the kiln for first firing (BISQUE). After bisque I paint her with 'stains or 'under glazes' and wipe off with a slightly wet sponge. This brings out more depth of the texture. I added 'Temokou' - a dark yummy glaze for her hair, and LOVE the results. Photo credit (below): Doug Birkenheuer Thank you for reading! If you have any questions - please email me.
2 Comments
Leave a Reply. |